Headless Ubuntu 14.04 Server with full disk encryption, remote unlock, software RAID, LVM and EFI for over 2TB disk support
Headless Ubuntu 14.01 LTS server with full disk encryption, remote unlock over SSH, software RAID, LVM and support for over 2TB disks with EFI and BIOS MBR boot. That's what this post is about. Oh, and pics are at the end.
I recently had to (re)install few Linux servers remotely with moderately complex requirements. Now when I think it's finally all working some documentation of steps taken might be in place. Who knows, this might even be useful to someone else as well?
To ensure data safety I wanted full disk encryption - including root filesystem. Another hurdle was mdraid mirrored 3TB disks requiring GPT partitions, not getting stuck on initramfs boot stage if there is minor problems with RAID had to be handled too, then I got stuck with all sorts of EFI boot problems, remote unlocking dmcrypt over SSH is still missing feature of Ubuntu and so on.
Following instructions use GPT partitions but setup will boot in both traditional BIOS MBR and EFI modes. It will also boot from degraded RAID and allow remote unlocking filesystem encryption. None of which is possible with regular Linux installers used by distributions as far as I know. Another bonus is ssh access to initramfs for also other purposes than unlocking encryption. While changes made are quite small, in the end this still causes risks when doing upgrades that affect kernel and initramfs creation. Major upgrades between releases should be avoided as they have high risks. Yet they do seem to work. I've tried upgrading older versions to 14.04, 14.04 to 14.10 and 14.10 to prerelease of 15.04. Both upgrade and unlocking crypto after boot worked over SSH just fine.
We're bootstrapping Ubuntu Server 14.04.1 LTS x64 but not using stock Ubuntu installer. Suitable (i.e. tested) operating systems to bootstrap from are Ubuntu 14.04, Debian 7.7, CentOS 7 and Hetzner rescue system (based on Debian 7). You can perform install either from "Live" or "Rescue" mode. Just remember that rescue modes tend to be more restricted and SSH server might not be available. Hetzner rescue system is full live text-mode Linux and obviously has SSH server running.
Ubuntu 14.04, Debian 7.7 and CentOS 7 tests were done using VMware ESXi 5.1 virtual machines. Hetzner part in turn using low cost "serverbidding" Xeon 1245v2 which is Asus P8B/WS with EFI completely disabled in BIOS settings.
To perform install in EFI mode only bootstrapping from Ubuntu 14.04, CentOS 7 and Debian 7.7 rescue media work because Debian live CDs lack EFI boot support. Switching to EFI mode after install is possible and depending on your motherboard settings it might even switch to EFI mode automatically on first boot.
Recommended install methods that support SSH during install.
lubuntu-14.04.1-desktop-amd64.iso (EFI and BIOS mode)
CentOS-7.0-1406-x86_64-livecd.iso (EFI and BIOS mode)
Hetzner Rescue-System (BIOS mode, based on Debian 7, PXE booted NFS root)
Since install and resulting system will require Internet access it's highly recommend to enable SSH server as first step. Then SSH to remote server to do rest of steps. Especially manually typing scripts required to unlock dmcrypt volumes after reboot is very error prone step.
To enable SSH server with Lubuntu Live boot launch terminal window and enter following commands:
These are NOT recommended methods due lack of SSH server.
ubuntu-14.04.1-server-amd64.iso (EFI and BIOS mode)
debian-7.7.0-live-amd64-rescue.iso (BIOS mode only, ISO image lacks EFI boot sector)
debian-7.7.0-amd64-CD-1.iso (EFI and BIOS mode)
Select "Rescue a broken system" on GRUB menu. Answer to questions when prompted or pick defaults. Eventually you reach prompt asking to pick root filesystem. Select "Do not use a root file system" and then "Execute shell in the installer environment". Because there's no SSH server included you need to type everything manually. If you're stuck with one of these options you should consider wgetting complex parts from external webserver in order to avoid typing it all.
We also make few assumptions. One of them is that all hard disks present will be erased and that disks are new or wiped. That means no existing partitions, no old mdraid array signatures, no funky boot sectors, no old data to keep etc.
If you get error messages about kernel not being able to re-read partitions, errors about active mdraid arrays preventing creation of new ones etc. here's few commands to try. Replace /dev/sda with /dev/sdb and repeat until you've gone thru all disks installed. Especially mdadm can be very persistent and ghost arrays keep coming back from grave time after time. For example if you had mirrored /boot and you wiped partitions on disk without first doing "mdadm --zero-superblock" it will suddenly reappear when you create new partition starting from same sector.
I have seen some people crying about Hetzner serverbidding.com dedicated servers not having new disks. I don't see how anyone could expect them to put new disks on dirt cheap used servers. Still checking SMART attributes and wiping disks before going live isn't bad idea. Well it isn't bad idea even with new disks or your own used disks. This is entirely optional step but remember it's impossible to do this later if you change your mind as it's destructive. Of course one could break RAID of running system to do destructive tests, but without dual-redundancy you're risking it all.
Depending on what sort of environment you're in some of these commands might fail or require install of additional packages. Steps below were tested only with Hetzner rescue system. Remember that only part that really matters is "dd if=/dev/zero" lines to overwrite disks with zeros. This will work with even most minimal rescue boot - everything else is optional and can be skipped.
Now when preparations are done we can finally start actual install process. As I've said multiple times you really should have SSH connection now open so you can copy-paste commands to remove server.
Following assumes you have two hard disks, /dev/sda and /dev/sdb, which will be mirrored using software RAID (mdraid). Same process works for single SSD, single HDD, hardware RAID and software RAID 5/6 with minimal changes. I've tried to mark where process diverts when you're using different underlying storage.
Remember you shouldn't blindly copy commands used, but also understand why and how they work. Otherwise you're royally screwed when your server fails to boot one day and you're stuck with very restrictive rescue mode boot to recover it. Backups? What did you say? Can't hear ya - and I have RAID! :)
We start all partitions at block divisible by 4096kiB (4MiB) to hopefully ensure proper sector alignment regardless how crazy underlying hardware is.
Having 8GB /boot is way overkill, but there's very good reason for this. If you're ever in position that requires reinstall of server with encrypted mdraid and lvm it can be tricky. With 8GB /boot you can break underlying mirror and do clean Linux install entirely on one half of it and reboot computer to completely new Linux install. After your new system is running from previous /boot you have full system with all tools in hand to work with to make it again redundant, enable lvm, perhaps convert from lvm+ext4 to zfs or btrfs etc. Way beyond scope of this document but very much doable if you're careful - and preferrably first test it all locally on virtual machine before touching remote headless server.
Naming of partitions, volumes and filesystems has some logic. Replace "S16" in beginning with your server name or some other ID which you will not reuse. This is to prevent issues due conflicting labels if you ever need to move disks between two servers that were both installed following this same guide. DO NOT use dashes in labels, it will confuse LVM. Keeping this ID short, 4 chars or less, is preferred. Too long labels will cause problems later, especially with vfat that has maximum volume label length of 11 chars.
Feel free to come up with own better naming as long as you have one. Calling them foobar1, xyzzy35 and sexypinkspeedoman42 might be humorous (and exactly what you should expect to find in my blog), but just don't do it. Imagine someone two years from now trying to remotely recover non-bootable server in minimal rescue mode. That should be challenge big enough even without obfuscated device names.
Device names, partition and filesystem labels used in rest of this post are:
1: EFI System Partition, 256MB (FAT32 has miminum size limits and ESP must be FAT32 formatted)
2: GRUB boot for MBR mode, 16MB
3: /boot to hold kernel and initramfs, around 8GB (minus EFI and GRUB), mdraid mirror
4: rest of disk from 8GB, mdraid mirror, then dmcrypt "LUKS", lvm and finally swap, root etc.
I hear you all. Pics or it didn't happen, right? Complete set of screenshots from installing server by following instructions above. Any deviations due this horrible WYSIAWYG editor blogger forces me to use.


I recently had to (re)install few Linux servers remotely with moderately complex requirements. Now when I think it's finally all working some documentation of steps taken might be in place. Who knows, this might even be useful to someone else as well?
To ensure data safety I wanted full disk encryption - including root filesystem. Another hurdle was mdraid mirrored 3TB disks requiring GPT partitions, not getting stuck on initramfs boot stage if there is minor problems with RAID had to be handled too, then I got stuck with all sorts of EFI boot problems, remote unlocking dmcrypt over SSH is still missing feature of Ubuntu and so on.
Following instructions use GPT partitions but setup will boot in both traditional BIOS MBR and EFI modes. It will also boot from degraded RAID and allow remote unlocking filesystem encryption. None of which is possible with regular Linux installers used by distributions as far as I know. Another bonus is ssh access to initramfs for also other purposes than unlocking encryption. While changes made are quite small, in the end this still causes risks when doing upgrades that affect kernel and initramfs creation. Major upgrades between releases should be avoided as they have high risks. Yet they do seem to work. I've tried upgrading older versions to 14.04, 14.04 to 14.10 and 14.10 to prerelease of 15.04. Both upgrade and unlocking crypto after boot worked over SSH just fine.
We're bootstrapping Ubuntu Server 14.04.1 LTS x64 but not using stock Ubuntu installer. Suitable (i.e. tested) operating systems to bootstrap from are Ubuntu 14.04, Debian 7.7, CentOS 7 and Hetzner rescue system (based on Debian 7). You can perform install either from "Live" or "Rescue" mode. Just remember that rescue modes tend to be more restricted and SSH server might not be available. Hetzner rescue system is full live text-mode Linux and obviously has SSH server running.
Ubuntu 14.04, Debian 7.7 and CentOS 7 tests were done using VMware ESXi 5.1 virtual machines. Hetzner part in turn using low cost "serverbidding" Xeon 1245v2 which is Asus P8B/WS with EFI completely disabled in BIOS settings.
To perform install in EFI mode only bootstrapping from Ubuntu 14.04, CentOS 7 and Debian 7.7 rescue media work because Debian live CDs lack EFI boot support. Switching to EFI mode after install is possible and depending on your motherboard settings it might even switch to EFI mode automatically on first boot.
Recommended install methods that support SSH during install.
lubuntu-14.04.1-desktop-amd64.iso (EFI and BIOS mode)
CentOS-7.0-1406-x86_64-livecd.iso (EFI and BIOS mode)
Hetzner Rescue-System (BIOS mode, based on Debian 7, PXE booted NFS root)
Since install and resulting system will require Internet access it's highly recommend to enable SSH server as first step. Then SSH to remote server to do rest of steps. Especially manually typing scripts required to unlock dmcrypt volumes after reboot is very error prone step.
To enable SSH server with Lubuntu Live boot launch terminal window and enter following commands:
sudo su -
apt-get update
apt-get -y install openssh-server
passwd lubuntu # change to ubuntu if using Ubuntu instead of Lubuntu
For CentOS 7 Live launch terminal and:
sudo su -
service sshd start
passwd liveuser
These are NOT recommended methods due lack of SSH server.
ubuntu-14.04.1-server-amd64.iso (EFI and BIOS mode)
debian-7.7.0-live-amd64-rescue.iso (BIOS mode only, ISO image lacks EFI boot sector)
debian-7.7.0-amd64-CD-1.iso (EFI and BIOS mode)
Select "Rescue a broken system" on GRUB menu. Answer to questions when prompted or pick defaults. Eventually you reach prompt asking to pick root filesystem. Select "Do not use a root file system" and then "Execute shell in the installer environment". Because there's no SSH server included you need to type everything manually. If you're stuck with one of these options you should consider wgetting complex parts from external webserver in order to avoid typing it all.
We also make few assumptions. One of them is that all hard disks present will be erased and that disks are new or wiped. That means no existing partitions, no old mdraid array signatures, no funky boot sectors, no old data to keep etc.
If you get error messages about kernel not being able to re-read partitions, errors about active mdraid arrays preventing creation of new ones etc. here's few commands to try. Replace /dev/sda with /dev/sdb and repeat until you've gone thru all disks installed. Especially mdadm can be very persistent and ghost arrays keep coming back from grave time after time. For example if you had mirrored /boot and you wiped partitions on disk without first doing "mdadm --zero-superblock" it will suddenly reappear when you create new partition starting from same sector.
# Unmount any mdadm disks that might have been automounted
umount /dev/md*

# Stop all found mdadm arrays
mdadm --stop --force /dev/md*

# Wipe mdadm superblock from all partitions found, even if not md raid partition
mdadm --zero-superblock --force /dev/sd*

# Zero old MBR and GPT partition information on /dev/sda
sgdisk -Z /dev/sda

# Create new GPT partition label on /dev/sda
parted -s /dev/sda mklabel gpt print

# Rescan partitions on /dev/sda
partprobe /dev/sda
I have seen some people crying about Hetzner serverbidding.com dedicated servers not having new disks. I don't see how anyone could expect them to put new disks on dirt cheap used servers. Still checking SMART attributes and wiping disks before going live isn't bad idea. Well it isn't bad idea even with new disks or your own used disks. This is entirely optional step but remember it's impossible to do this later if you change your mind as it's destructive. Of course one could break RAID of running system to do destructive tests, but without dual-redundancy you're risking it all.
Depending on what sort of environment you're in some of these commands might fail or require install of additional packages. Steps below were tested only with Hetzner rescue system. Remember that only part that really matters is "dd if=/dev/zero" lines to overwrite disks with zeros. This will work with even most minimal rescue boot - everything else is optional and can be skipped.
# Dump "before" SMART info of disks to files
# You might want to make copies of these for future use in order to compare "before"
# and "after" state
smartctl -a /dev/sda > /tmp/smart-sda-before.txt
smartctl -a /dev/sdb > /tmp/smart-sdb-before.txt
# Next step is optional and only required if you want to overwrite disks with random
# rather than zero. Stock Linux "urandom" is far from unlimited, hence we're compiling
# frandom module.

# Install compiler
apt-get -y install build-essential

# Download frandom
mkdir -p /opt/src/frandom
cd /opt/src/frandom
wget http://billauer.co.il/download/frandom-1.1.tar.gz

# Unpack and compile
tar xvzf frandom-1.1.tar.gz
cd frandom-1.1
make

# Install
install -m 644 frandom.ko /lib/modules/`uname -r`/kernel/drivers/char/
depmod -a

# Load new kernel module
modprobe frandom

# Overwrite disks with random data using /dev/frandom we just added
dd if=/dev/frandom of=/dev/sda bs=1M &
dd if=/dev/frandom of=/dev/sdb bs=1M &

# You can monitor status of dd by sending it "USR1" signal
killall -USR1 dd
# Overwrite both disks with zero
# If disk has pending sectors only writing zeros will trigger bad block reallocation

# Overwrite disks with zeros (0x00)
dd if=/dev/zero of=/dev/sda bs=1M &
dd if=/dev/zero of=/dev/sdb bs=1M &

# USR1 dumps status of dd, this will take around 6 hours for 3TB SATA disk
killall -USR1 dd

# Initiate long smart tests, this will take around 6 hours for 3TB SATA disk
smartctl -t long /dev/sda
smartctl -t long /dev/sdb

# Dump "after" smart info to files
# Make copies of these as well for future reference
smartctl -a /dev/sda > /tmp/smart-sda-after.txt
smartctl -a /dev/sdb > /tmp/smart-sdb-after.txt
Now when preparations are done we can finally start actual install process. As I've said multiple times you really should have SSH connection now open so you can copy-paste commands to remove server.
Following assumes you have two hard disks, /dev/sda and /dev/sdb, which will be mirrored using software RAID (mdraid). Same process works for single SSD, single HDD, hardware RAID and software RAID 5/6 with minimal changes. I've tried to mark where process diverts when you're using different underlying storage.
Remember you shouldn't blindly copy commands used, but also understand why and how they work. Otherwise you're royally screwed when your server fails to boot one day and you're stuck with very restrictive rescue mode boot to recover it. Backups? What did you say? Can't hear ya - and I have RAID! :)
We start all partitions at block divisible by 4096kiB (4MiB) to hopefully ensure proper sector alignment regardless how crazy underlying hardware is.
Having 8GB /boot is way overkill, but there's very good reason for this. If you're ever in position that requires reinstall of server with encrypted mdraid and lvm it can be tricky. With 8GB /boot you can break underlying mirror and do clean Linux install entirely on one half of it and reboot computer to completely new Linux install. After your new system is running from previous /boot you have full system with all tools in hand to work with to make it again redundant, enable lvm, perhaps convert from lvm+ext4 to zfs or btrfs etc. Way beyond scope of this document but very much doable if you're careful - and preferrably first test it all locally on virtual machine before touching remote headless server.
Naming of partitions, volumes and filesystems has some logic. Replace "S16" in beginning with your server name or some other ID which you will not reuse. This is to prevent issues due conflicting labels if you ever need to move disks between two servers that were both installed following this same guide. DO NOT use dashes in labels, it will confuse LVM. Keeping this ID short, 4 chars or less, is preferred. Too long labels will cause problems later, especially with vfat that has maximum volume label length of 11 chars.
Feel free to come up with own better naming as long as you have one. Calling them foobar1, xyzzy35 and sexypinkspeedoman42 might be humorous (and exactly what you should expect to find in my blog), but just don't do it. Imagine someone two years from now trying to remotely recover non-bootable server in minimal rescue mode. That should be challenge big enough even without obfuscated device names.
Device names, partition and filesystem labels used in rest of this post are:
- /dev/sda - First physical hard disk
- /dev/sdb - Second physical hard disk
- /dev/sda1 - EFI System Partition on 1st disk
- /dev/sdb1 - EFI System Partition on 2nd disk
- S16_ESP_1 - EFI and FAT32 label for /dev/sda1
- S16_ESP_2 - EFI and FAT32 label for /dev/sdb1
- /dev/sda2 - GRUB BIOS Boot Partition on 1st disk
- /dev/sdb2 - GRUB BIOS Boot Partition on 2nd disk
- S16_GRUB_1 - EFI label for /dev/sda2
- S16_GRUB_2 - EFI label for /dev/sdb2
- /dev/sda3 - RAID-1 (mdraid) partition for /boot on 1st disk
- /dev/sdb3 - RAID-1 (mdraid) partition for /boot on 2nd disk
- S16_dp_boot_1 - EFI label for /dev/sda3, component of mdraid array with label S16_rp_boot
- S16_dp_boot_2 - EFI label for /dev/sdb3, component of mdraid array with label S16_rp_boot
- /dev/md/S16_rp_boot - mdraid array for /boot assembled using /dev/sda3 and /dev/sdb3
- S16_fp_boot - EXT4 filesystem label for /dev/rp_boot
- /dev/sda4 - RAID-10 (mdraid) partition for dmcrypt on 1st disk
- /dev/sdb4 - RAID-10 (mdraid) partition for dmcrypt on 2nd disk
- S16_de_data_1 - EFI label for /dev/sda4, component of mdraid array with label S16_re_data
- S16_de_data_2 - EFI label for /dev/sdb4, component of mdraid array with label re_data
- /dev/md/S16_re_data - mdraid array for dmcrypted lvm volume with swap, root, etc.
- /dev/mapper/S16_rd_data - dmcrypt label after encryption has been opened
- /dev/mapper/S16_rd_vg01 - lvm volume used for swap, root, etc.
- /dev/S16_rd_vg01/swap - swap (encrypted)
- S16_fd_swap - swap partition label
- /dev/S16_rd_vg01/root - root (encrypted)
- S16_fd_root - EXT4 root filesystem label
1: EFI System Partition, 256MB (FAT32 has miminum size limits and ESP must be FAT32 formatted)
2: GRUB boot for MBR mode, 16MB
3: /boot to hold kernel and initramfs, around 8GB (minus EFI and GRUB), mdraid mirror
4: rest of disk from 8GB, mdraid mirror, then dmcrypt "LUKS", lvm and finally swap, root etc.
# Depending on what OS you're using to bootstrap this it might be missing some packages
# Ubuntu / Lubuntu Live will need this
apt-get update
apt-get --no-install-recommends -y install mdadm

# Partition first disk
parted -s -a optimal /dev/sda \
       mklabel gpt \
       mkpart S16_ESP_1 4MiB 260MiB \
       set 1 boot on \
       mkpart S16_GRUB_1 260MiB 276MiB \
       set 2 bios_grub on \
       mkpart S16_dp_boot_1 276MiB 8GiB \
       set 3 legacy_boot on \
       mkpart S16_de_data_1 8GiB 100% \
       print

# Partition second disk
parted -s -a optimal /dev/sdb \
       mklabel gpt \
       mkpart S16_ESP_2 4MiB 260MiB \
       set 1 boot on \
       mkpart S16_GRUB_2 260MiB 276MiB \
       set 2 bios_grub on \
       mkpart S16_dp_boot_2 276MiB 8GiB \
       set 3 legacy_boot on \
       mkpart S16_de_data_2 8GiB 100% \
       print

# For single disk or hardware raid just do /dev/sda step
# If you have more than two disks change /dev/sdb to /dev/sdc and trailing
# _2 to _3 repeating as many times as required
# Create RAID-1 for /boot. This can't be encrypted
echo y | mdadm --create /dev/md103 --force --assume-clean --level=raid1  --raid-device=2 \
               --homehost=S16 --name=S16_rp_boot --bitmap=internal \
               /dev/sda3 /dev/sdb3

# Create RAID-10 for encrypted LVM
echo y | mdadm --create /dev/md104 --force --assume-clean --level=raid10 --raid-device=2 \
               --homehost=S16 --name=S16_re_data --bitmap=internal --layout=f2 \
               /dev/sda4 /dev/sdb4

# For single disk or hardware raid skip above step completely. For setups not using
# mdraid you must adjust ALL commands used from now on and replace /dev/md103 with
# /dev/sda3 and /dev/md104 with /dev/sda4

# If you have more than two disks adjust "--raid-device" but keep "--level=raid1" for /boot
# For encrypted part you can change RAID level to 5 or 6 and add hot spares
# Encrypt disk and mount it, aligned to 4MiB (8192 * 512bytes)
# Pick good password or don't
cryptsetup luksFormat -v --align-payload=8192 /dev/md104
cryptsetup luksOpen -v /dev/md104 S16_rd_data
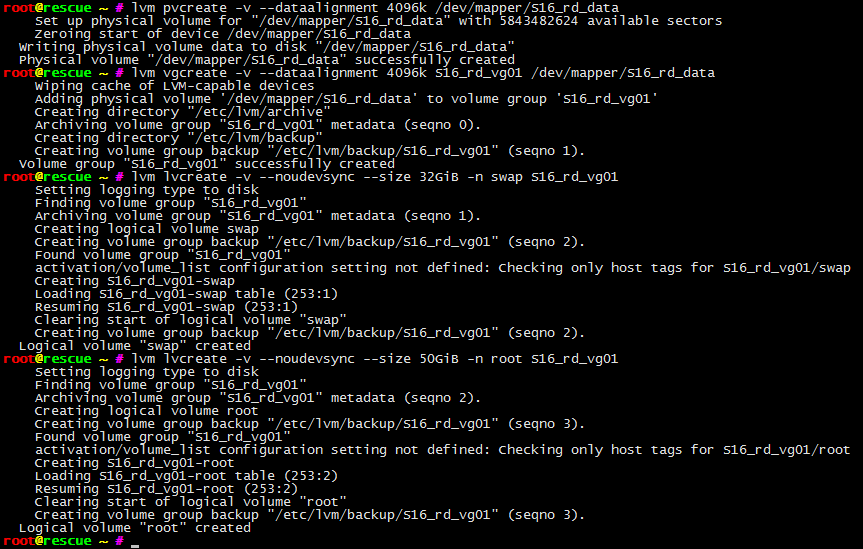
# Crete LVM physical disk
lvm pvcreate -v --dataalignment 4096k /dev/mapper/S16_rd_data

# Create LVM volume group
lvm vgcreate -v --dataalignment 4096k S16_rd_vg01 /dev/mapper/S16_rd_data

# Create LVM logical volumes for swap and root
# Leaves most of disk unused for now, you can resize root and create extra partitions later
# Debian requires --noudevsync, Centos7 Live fails with it, Ubuntu doesn't seem to care
lvm lvcreate -v --noudevsync --size 32GiB -n swap S16_rd_vg01
lvm lvcreate -v --noudevsync --size 50GiB -n root S16_rd_vg01
# Format swap
mkswap -L"S16_fd_swap" /dev/S16_rd_vg01/swap

# Format /boot
mkfs.ext4 -L"S16_fp_boot" /dev/md103

# Format rootfs
mkfs.ext4 -L"S16_fd_root" /dev/S16_rd_vg01/root
# Next we get to debootstrap part to actually install something

# Mount new root + boot filesystems and prepare for debootstrap process
mkdir -p /newsys
mount /dev/S16_rd_vg01/root /newsys
mkdir -p /newsys/boot
mount /dev/md103 /newsys/boot

# Download and install Ubuntu keyring and debootstrap in case we're not running Ubuntu yet
mkdir -p /tmp/debootstrap
cd /tmp/debootstrap
wget http://archive.ubuntu.com/ubuntu/pool/main/u/ubuntu-keyring/ubuntu-keyring_2011.11.21.1.tar.gz
#
# Check md5sum - cfa87364720b96e5ca15ef7b2cb4c948
md5sum ubuntu-keyring_2011.11.21.1.tar.gz
# If it matches unpack
tar xzf ubuntu-keyring_2011.11.21.1.tar.gz
#
wget http://archive.ubuntu.com/ubuntu/pool/main/d/debootstrap/debootstrap_1.0.66_all.deb
#
# Check md5sum - 040f3afe15b2b6dd953df6eb2091562f
md5sum debootstrap_1.0.66_all.deb
#
# Unpack and install
ar -x debootstrap_1.0.66_all.deb
tar xzf data.tar.gz -C /

# Many packages required won't work if installad as part of debootstrap so we don't do so
debootstrap --keyring=/tmp/debootstrap/ubuntu-keyring-2011.11.21.1/keyrings/ubuntu-archive-keyring.gpg \
            --include=dosfstools --arch=amd64 trusty /newsys http://nl.archive.ubuntu.com/ubuntu/
# Mount proc, sysfs and dev required for next steps
mount -t proc   proc /newsys/proc
mount -t sysfs  sys  /newsys/sys
mount -o bind   /dev /newsys/dev
mount -t devpts pts  /newsys/dev/pts

# We need mtab, but copying /proc/mounts will cause problems so hack a bit..
cat /etc/mtab | grep /newsys | sed -e's|/newsys|/|g' -e's|//|/|g' > /newsys/etc/mtab

# chroot to new install to continue
LANG= chroot /newsys /bin/bash
# Create missing mdraid device links
# Skip this for single disk and hardware raid installs
mkdir -p /dev/md
ln -s /dev/md103 /dev/md/S16_rp_boot
ln -s /dev/md104 /dev/md/S16_re_data
# Format EFI System Partitions on both disks as FAT32
# For compatibility reasons it must be FAT32, not even FAT16 or exFAT
# Adjust for more / less than two disk
mkfs.vfat -v -F32 -s2 -n "S16_ESP_1" /dev/sda1
mkfs.vfat -v -F32 -s2 -n "S16_ESP_2" /dev/sdb1

# Create fstab for our new install
# Adjust for more / less than two disk
echo "UUID=$(blkid -t LABEL=S16_fd_root -s UUID -o value) / ext4 defaults,noatime,discard,errors=remount-ro 0 1" >/etc/fstab
echo "UUID=$(blkid -t LABEL=S16_fp_boot -s UUID -o value) /boot ext4 defaults,noatime,discard,nobootwait,nofail 0 2" >>/etc/fstab
echo "UUID=$(blkid -t LABEL=S16_fd_swap -s UUID -o value) swap swap defaults,discard 0 2" >>/etc/fstab
echo "UUID=$(blkid -t LABEL=S16_ESP_1 -s UUID -o value) /boot/efi1 vfat defaults,nobootwait,nofail 0 0" >>/etc/fstab
echo "UUID=$(blkid -t LABEL=S16_ESP_2 -s UUID -o value) /boot/efi2 vfat defaults,nobootwait,nofail 0 0" >>/etc/fstab

# Create crypttab required to mount encrypted lvm on boot
# Replace /dev/md/S16_re_data with /dev/sda4 for single disk and hardware RAID installs
echo "S16_rd_data UUID=$(blkid /dev/md/S16_re_data -s UUID -o value) none luks,discard" >/etc/crypttab

# Verify contents of new /etc/crypttab, it should look like this but with different UUID
# S16_rd_data UUID=559f891f-bb07-4879-a9d7-59744f875d98 none luks,discard

# Now this is bit tricky, while we're chrooted update-initramfs ignores /etc/cryptroot
# This in turn causes conf/conf.d/cryptroot file not to be generated and initramfs
# never attempts to decrypt disks resulting in lvm failure preventing boot entirely.
#
# Therefore we need to generate our own file and place it in /etc/initramfs-tools/conf.d
# Replace /dev/md/S16_re_data with /dev/sda4 for single disk and hardware RAID installs
#
echo "target=S16_rd_data,source=UUID="$(blkid /dev/md/S16_re_data -s UUID -o value)",key=none,rootdev,lvm=S16_rd_vg01-root,discard">/etc/initramfs-tools/conf.d/cryptroot
# We need to mount EFI System Partitions as /boot/efi1 and /boot/efi2
# Adjust for more / less than two disk
mkdir -p /boot/efi1 /boot/efi2
mount -a

# Protect content of /boot
chmod 0700 /boot

# Set hostname
echo "server16" >/etc/hostname

# Also update hosts file to prevent warnings from sudo etc.
cat<<'__EOF__'>/etc/hosts
127.0.0.1 localhost
127.0.0.1 server16 server16.example.com

::1 ip6-localhost ip6-loopback
fe00::0 ip6-localnet
ff00::0 ip6-mcastprefix
ff02::1 ip6-allnodes
ff02::2 ip6-allrouters
ff02::3 ip6-allhosts
__EOF__

# Setup static IP for network
cat<<'__EOF__'>/etc/network/interfaces
auto lo
iface lo inet loopback
auto eth0
iface eth0 inet static
  address   10.236.109.240
  network   10.236.108.0
  broadcast 10.236.108.255
  gateway   10.236.108.1
  netmask   255.255.254.0
__EOF__

# DNS too
cat<<'__EOF__'>/etc/resolv.conf
options timeout:2 attempts:2 rotate
nameserver 8.8.8.8
nameserver 8.8.4.4
nameserver 74.82.42.42
nameserver 208.67.222.222
__EOF__
# Ugly hack to prevent launching of services while setting up system with apt-get
mkdir -p /tmp/fakestart
ln -s /bin/true /tmp/fakestart/initctl
ln -s /bin/true /tmp/fakestart/invoke-rc.d
ln -s /bin/true /tmp/fakestart/restart
ln -s /bin/true /tmp/fakestart/start
ln -s /bin/true /tmp/fakestart/stop
ln -s /bin/true /tmp/fakestart/start-stop-daemon
ln -s /bin/true /tmp/fakestart/service
export PATH=/tmp/fakestart:$PATH
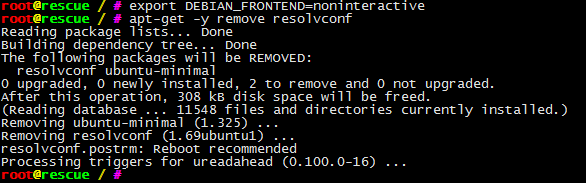
# Enable full repositories, we need for example dropbear not included in main repos
cat <<'__EOF__'>/etc/apt/sources.list
deb http://nl.archive.ubuntu.com/ubuntu/ trusty main restricted
deb-src http://nl.archive.ubuntu.com/ubuntu/ trusty main restricted
deb http://nl.archive.ubuntu.com/ubuntu/ trusty-updates main restricted
deb-src http://nl.archive.ubuntu.com/ubuntu/ trusty-updates main restricted
deb http://nl.archive.ubuntu.com/ubuntu/ trusty universe
deb-src http://nl.archive.ubuntu.com/ubuntu/ trusty universe
deb http://nl.archive.ubuntu.com/ubuntu/ trusty-updates universe
deb-src http://nl.archive.ubuntu.com/ubuntu/ trusty-updates universe
deb http://nl.archive.ubuntu.com/ubuntu/ trusty multiverse
deb-src http://nl.archive.ubuntu.com/ubuntu/ trusty multiverse
deb http://nl.archive.ubuntu.com/ubuntu/ trusty-updates multiverse
deb-src http://nl.archive.ubuntu.com/ubuntu/ trusty-updates multiverse
deb http://nl.archive.ubuntu.com/ubuntu/ trusty-backports main restricted universe multiverse
deb-src http://nl.archive.ubuntu.com/ubuntu/ trusty-backports main restricted universe multiverse
deb http://security.ubuntu.com/ubuntu trusty-security main restricted
deb-src http://security.ubuntu.com/ubuntu trusty-security main restricted
deb http://security.ubuntu.com/ubuntu trusty-security universe
deb-src http://security.ubuntu.com/ubuntu trusty-security universe
deb http://security.ubuntu.com/ubuntu trusty-security multiverse
deb-src http://security.ubuntu.com/ubuntu trusty-security multiverse
__EOF__

# Prevent apt-get from asking silly questions
export DEBIAN_FRONTEND=noninteractive
# Fix DNS resolution issues for good by removing root cause
# This package is stubborn and can't be excluded during deboostrap
apt-get -y remove resolvconf

# Install some more or less mandatory packages
apt-get update
apt-get --no-install-recommends -y install openssh-server mdadm gdisk parted efibootmgr \
        grub-efi-amd64 grub-pc-bin nano linux-image-generic cryptsetup lvm2 locales dropbear

# Set root password
passwd root

# Allow root over ssh because we're professionals
sed -i.bak -e's/.*PermitRootLogin.*/PermitRootLogin yes/g' /etc/ssh/sshd_config
# Clone parts of EFI partitions to legacy MBR partition format for compatibility reasons

# Compatibility fix to overcome issue with over 8GB partitions and some old bioses
# Adjust for more / less than two disk
sgdisk -C /dev/sda
sgdisk -C /dev/sdb

# Generate hybrid-MBR with gptbios, boot and root partitions included for improved BIOS compatibility
# Adjust for more / less than two disk
sgdisk -h 2 /dev/sda
sgdisk -h 2 /dev/sdb

# Set gptbios partition as active in MBR, there's systems out that won't boot without active MBR partition
# Adjust for more / less than two disk
sfdisk --force -A2 /dev/sda
sfdisk --force -A2 /dev/sdb
# Install grub and configure EFI for booting from our new install

# Create devicemap for grub (/boot/grub/device.map)
mkdir -p /boot/grub
grub-mkdevicemap -nvv

# Skip efibootmgr commands below if you're not in EFI mode
#
# Clear existing EFI NVRAM boot order, it's more than likely incorrect for our needs by now
# Also sets 10 second timeout for EFI boot menu just in case it was set to too low value earlier
efibootmgr --delete-bootorder --timeout 10 --write-signature

# Remove unwanted, existing boot entries from EFI list, list was shown after previous command
efibootmgr --delete-bootnum --bootnum 0000
efibootmgr --delete-bootnum --bootnum 0001
efibootmgr --delete-bootnum --bootnum 0002
efibootmgr --delete-bootnum --bootnum 0003
efibootmgr --delete-bootnum --bootnum 0004
efibootmgr --delete-bootnum --bootnum 0005
efibootmgr --delete-bootnum --bootnum 0006


# Install grub to ESP's on both disks, you can do this even if you don't have EFI for future compatibility
# If system is EFI capable but was not booted in EFI mode this will spew some errors which can be ignored
# Adjust for more / less than two disk
grub-install --boot-directory=/boot --bootloader-id="EFI S16, disk 1" --target=x86_64-efi --efi-directory=/boot/efi1 /dev/sda
grub-install --boot-directory=/boot --bootloader-id="EFI S16, disk 2" --target=x86_64-efi --efi-directory=/boot/efi2 /dev/sdb

# For BIOS compatibility if you ever need to boot from these disks without having EFI
# This also installs required parts of GRUB boot loader to /dev/sda2 and /dev/sdb2
# Adjust for more / less than two disk
grub-install --target=i386-pc /dev/sda
grub-install --target=i386-pc /dev/sdb

# This feature is officially intended only for EFI booting from removable media, but
# it can be used for hard disks as well. Do this even if you're NOT in EFI mode currently.
#
# Trick here is it allows you to make disks EFI bootable while system is not in EFI mode.
# Adjust for more / less than two disk
#
# First disk
mkdir -p /boot/efi1/EFI/BOOT
cp -a "/boot/efi1/EFI/EFI S16, disk 1/grubx64.efi" /boot/efi1/EFI/BOOT/bootx64.efi
# Skip efibootmgr part if currently not booted in EFI mode
efibootmgr --create --disk /dev/sda --part 1  --write-signature \
           --loader '\EFI\BOOT\bootx64.efi' --label "EFI S16 fallback, disk 1"
#
# Second disk
mkdir -p /boot/efi2/EFI/BOOT
cp -a "/boot/efi2/EFI/EFI S16, disk 2/grubx64.efi" /boot/efi2/EFI/BOOT/bootx64.efi
# Skip efibootmgr part if currently not booted in EFI mode
efibootmgr --create --disk /dev/sdb --part 1  --write-signature \
           --loader '\EFI\BOOT\bootx64.efi' --label "EFI S16 fallback, disk 2"


# Skip below if you're not in EFI mode and got sane computer not locked to Windows world
#
# Some manufacturers (Lenovo, ASUS) only allow booting Windows when in EFI mode so we play safe
# and add extra bootloader entries claiming to be Windows while it's just GRUB again
# Adjust for more / less than two disk
#
# First disk
mkdir -p /boot/efi1/EFI/Microsoft/Boot/
cp -a "/boot/efi1/EFI/EFI S16, disk 1/grubx64.efi" /boot/efi1/EFI/Microsoft/Boot/bootmgfw.efi
efibootmgr --create --disk /dev/sda --part 1  --write-signature \
           --loader '\EFI\Microsoft\Boot\bootmgfw.efi' --label "Windows Boot Manager"
#
# Second disk
# Requirement of using identical "Windows Boot Manager" label will cause warning
mkdir -p /boot/efi2/EFI/Microsoft/Boot/
cp -a "/boot/efi2/EFI/EFI S16, disk 2/grubx64.efi" /boot/efi2/EFI/Microsoft/Boot/bootmgfw.efi
efibootmgr --create --disk /dev/sdb --part 1  --write-signature \
           --loader '\EFI\Microsoft\Boot\bootmgfw.efi' --label "Windows Boot Manager"


# Reorder EFI boot list if required, probably is as adding entries can make it reverse
# On next boot EFI firmware will likely add few more entries, but we don't need to worry about those
# as they should be in the end of list
efibootmgr --bootorder 0000,0001,0002,0003
# Silent boot is nonsense causing nothing but trouble
#
# This will change kernel parameters to be more verbose, try to allow boot with degraded RAID,
# and also enables on-the-fly compression for swap
#
# I have feeling that some of these are no longer valid parameters (if they ever were) due
# constant battle between developers breaking things and users trying to find workarounds to
# those unwanted changes...
#
sed -i.bak -e's|^GRUB_CMDLINE_LINUX_DEFAULT=.*|GRUB_CMDLINE_LINUX_DEFAULT="verbose bootdegraded=true bootwait=5 zswap.enabled=1 zswap.compressor=lz4"|g' \
           -e's|^GRUB_HIDDEN_|#GRUB_HIDDEN_|g' /etc/default/grub
#
# Workaround for diskfilter write error with GRUB and mdraid
sed -i -e's|^quiet_boot="1"|quiet_boot="0"|g' -e's|^quick_boot="1"|quick_boot="0"|g' /etc/grub.d/10_linux
#
# More fixes
cat<<'__EOF__'>>/etc/default/grub
GRUB_SAVEDEFAULT=n
GRUB_TERMINAL_OUTPUT=console
GRUB_TERMINAL=console
GRUB_DISABLE_RECOVERY=y
GRUB_DISABLE_SUBMENU=y
GRUB_DISABLE_OS_PROBER=y
GRUB_GFXPAYLOAD=text
GRUB_GFXPAYLOAD_LINUX=keep
__EOF__
# For single disk and hardware RAID systems skip below
#
# Ubuntu initramfs is not able to handle degraded RAID arrays. I'm aware of all sorts
# of "magic" parameters one can set but if you look inside what initramfs scripts do
# they don't even check for those settings or try to do anything smart when there's error.
#
# What we do below is force arrays online even if some disks are missing. It's far better
# to bring system up in such case and let admin sort it out. Other option is dropping
# to initramfs shell and taking all down for good. Morons...
#
# As usual one more hack. Not that it should do anything bad because md arrays can't be
# taken down if they already came up ok. If they didn't by time this script is run
# it's game over without this.
#
cat >/usr/share/initramfs-tools/scripts/init-premount/zzmdraidtryharder <<'__EOF__'
#!/bin/sh
PREREQ=""
prereqs() {
        echo "$PREREQ"
}
case "$1" in
        prereqs)
                prereqs
                exit 0
        ;;
esac
. /scripts/functions

sleep 15
echo ""
echo ""
echo "Before fix mdraid status from /proc/mdstat"
cat /proc/mdstat
echo ""
echo "Force-starting arrays with missing or unsynced disks (if any)"
echo""
echo ""
mdadm --misc --run /dev/md*
echo ""
echo "After fix mdraid status from /proc/mdstat"
cat /proc/mdstat
echo ""
sleep 5
__EOF__

# Make it executable
chmod a+x /usr/share/initramfs-tools/scripts/init-premount/zzmdraidtryharder
# Now remote unlock part and dropbear ssh support

# Create script to run whenever initramfs is created and apply fixups
cat >/usr/share/initramfs-tools/hooks/dropbear.fixup <<'__EOF__'
#!/bin/sh
PREREQ="dropbear"
prereqs() {
    echo "$PREREQ"
}
case "$1" in
    prereqs)
        prereqs
        exit 0
    ;;
esac

. "${CONFDIR}/initramfs.conf"
. /usr/share/initramfs-tools/hook-functions

if [ "${DROPBEAR}" != "n" ] && [ -r "/etc/crypttab" ] ; then

# Create missing nsswitch.conf
echo "passwd: files" > "${DESTDIR}/etc/nsswitch.conf"

# Create missing shadow
grep "^root:" /etc/shadow > "${DESTDIR}/etc/shadow"

# Copy missing libs
cp /lib/x86_64-linux-gnu/libnss_* "${DESTDIR}/lib/"

# Create unlock script
cat > "${DESTDIR}/bin/unlock" << _EOF_
#!/bin/sh
if PATH=/lib/unlock:/bin:/sbin /scripts/local-top/cryptroot; then
    kill \`ps | grep cryptroot | grep -v "grep" | awk '{print \$1}'\`
    exit 0
fi
exit 1
_EOF_
chmod 755 "${DESTDIR}/bin/unlock"

# No idea, came from someone elses blog :)
mkdir -p "${DESTDIR}/lib/unlock"
cat > "${DESTDIR}/lib/unlock/plymouth" << _EOF_
#!/bin/sh
[ "\$1" == "--ping" ] && exit 1
/bin/plymouth "\$@"
_EOF_
chmod 755 "${DESTDIR}/lib/unlock/plymouth"

# Update motd
echo To unlock root-partition run "unlock" >> ${DESTDIR}/etc/motd

fi
__EOF__

# Make it executable
chmod a+x /usr/share/initramfs-tools/hooks/dropbear.fixup

# Second script to handle converting SSH keys.
# You might NOT want to use this as now your SSH keys are stored inside
# plaintext initramfs instead of only encypted volume.
cat >/usr/share/initramfs-tools/hooks/dropbear.fixup2 <<'__EOF__'
#!/bin/sh
PREREQ="dropbear"
prereqs() {
    echo "$PREREQ"
}
case "$1" in
    prereqs)
        prereqs
        exit 0
    ;;
esac

. "${CONFDIR}/initramfs.conf"
. /usr/share/initramfs-tools/hook-functions

if [ "${DROPBEAR}" != "n" ] && [ -r "/etc/crypttab" ] ; then

# Convert SSH keys
/usr/lib/dropbear/dropbearconvert openssh dropbear /etc/ssh/ssh_host_dsa_key ${DESTDIR}/etc/dropbear/dropbear_dss_host_key
/usr/lib/dropbear/dropbearconvert openssh dropbear /etc/ssh/ssh_host_rsa_key ${DESTDIR}/etc/dropbear/dropbear_rsa_host_key

fi
__EOF__

# Make it executable
chmod a+x /usr/share/initramfs-tools/hooks/dropbear.fixup2

# Shutdown network after exiting initramfs
cat >/usr/share/initramfs-tools/scripts/init-bottom/dropbear.fixup3 <<'__EOF__'
#!/bin/sh
PREREQ=""
prereqs() {
        echo "$PREREQ"
}
case "$1" in
        prereqs)
                prereqs
                exit 0
        ;;
esac
. /scripts/functions

# Shutdown initramfs network before passing control to regular Ubuntu scripts
# Without this network config from initramfs is used forever plus causes extra
# few minutes of delay plus errors on bootup.
ifconfig eth0 0.0.0.0 down
__EOF__

# Make it executable
chmod a+x /usr/share/initramfs-tools/scripts/init-bottom/dropbear.fixup3

# Silence error messages from stock scripts looking wrongly named libs
touch /lib/libnss_

# Enable static IP as there's no DHCP servers around
sed -i.bak /etc/initramfs-tools/initramfs.conf \
    -e's|^DEVICE=.*|IP=10.236.109.240::10.236.108.1:255.255.254.0:S16:eth0|g'
# Make sure our initramfs always includes cryptoroot components
echo "CRYPTSETUP=y" >>/etc/initramfs-tools/initramfs.conf

# For unknown reason above setting does NOT always work so we need to patch
# script directly and force inclusion of cryptoroot components
sed -i -e's|^setup="no"$|setup="yes"|g' /usr/share/initramfs-tools/hooks/cryptroot

# Rebuild initramdisk so it includes our remote SSH unlock, mdraid fix and cryptroot file
update-initramfs -c -k all

# Update grub.cfg
update-grub

# Before reboot check that new initramfs includes cryptroot components
lsinitramfs /boot/initrd.img-3.13.0-40-generic | grep cryptroot
# conf/conf.d/cryptroot
# scripts/local-top/cryptroot
#
lsinitramfs /boot/initrd.img-3.13.0-40-generic | grep cryptsetup
# sbin/cryptsetup
# lib/cryptsetup
# lib/cryptsetup/askpass
# lib/libcryptsetup.so.4

# Exit chroot and reboot
# Don't forget to remove your live / rescue boot media
exit
reboot
# After a short while SSH to your server IP as "root" with password you just set
# Next type "unlock" and enter password set for dmcrypt encryption
# You need to disconnect and reconnect after unlocking because first SSH connection
# was to now terminated initramfs context.


# Login as root to do some cleanup and finalize settings

# You can now remove cryptroot config file and let update-initramfs generate it from
# crypttab from now on. Still might be wise to check initramfs image before next reboot
# to be safe.
rm -f /etc/initramfs-tools/conf.d/cryptroot

# Prevent apt-get from asking silly questions
export DEBIAN_FRONTEND=noninteractive

# Update distro, install common tools and some extra packages
apt-get update
apt-get -y dist-upgrade
apt-get -y install ubuntu-standard joe wget curl screen python perl mtr traceroute \
                   language-pack-en fail2ban boot-info-script i7z sysstat \
                   build-essential python-software-properties software-properties-common \
                   linux-source linux-headers-generic smartmontools ntp
# Set locale
update-locale LANG=en_US.UTF-8 LANGUAGE=en_US

# Set timezone
cp -f /usr/share/zoneinfo/Europe/Helsinki /etc/localtime
echo "Europe/Helsinki" >/etc/timezone

# Set keyboard layout
sed -i.bak -e's|^XKBLAYOUT=.*|XKBLAYOUT="fi"|g' /etc/default/keyboard
dpkg-reconfigure keyboard-configuration
dpkg-reconfigure console-setup

# Create regular user account, allow sudo, set password
adduser hacker --shell /bin/bash --disabled-password --gecos hacker
usermod -a -G sudo hacker
passwd hacker
# Always prefer IPv4 over IPv6 due suboptimal IPv6 routing and peering
echo "precedence ::ffff:0:0/96  100" >>/etc/gai.conf

# After aboce our existing IPv6 NTP (2.ubuntu.pool.ntp.org) will resolve
# to IPv4 address so add couple IPv6 servers to mix
cat<<'__EOF__'>>/etc/ntp.conf
server 2001:638:504:2000::32
server 2001:418:3ff::53
server 2001:16d8:aaaa:3::2
__EOF__
service ntp restart

# One final reboot and we're...
reboot

# ...DONE!
I hear you all. Pics or it didn't happen, right? Complete set of screenshots from installing server by following instructions above. Any deviations due this horrible WYSIAWYG editor blogger forces me to use.
First off, thanks for this post. Very helpful!
ReplyDeleteHere's my version of "zzmdarraytryharder". I was getting a '/dev/md is a directory' error with your script. Basically it checks for inactive arrays and forcibly assembles them with all the disks that are listed for that array in /proc/mdstat.
I hope the codes doesn't get broken when posting it here:
#!/bin/sh
PREREQ=""
prereqs() {
echo "$PREREQ"
}
case "$1" in
prereqs)
prereqs
exit 0
;;
esac
. /scripts/functions
sleep 10
echo "Looking for inactive arrays ..."
cat /proc/mdstat
echo ""
i=0;
for md in $(cat /proc/mdstat | grep inactive | cut -d\ -f1); do
devs="$(cat /proc/mdstat | grep ^$md | cut -d\ -f5- | sed -e 's/\[[0-9]\]//g' -e 's/sd/\/dev\/sd/g')"
echo "$md is inactive. Devices: $devs"
echo "Stopping $md ..."
mdadm --stop /dev/$md
echo "Assembling $md ..."
mdadm --assemble --force /dev/$md $devs || ( echo "Assembling $md (--force) ..."; mdadm --assemble --force /dev/$md $devs)
echo ""
i=$(( $i + 1 ))
done
echo ""
if [ $i -gt 0 ]; then
echo "$i arrays were inactive."
echo "/proc/mdstat is now:"
cat /proc/mdstat
sleep 5
else
echo "All arrays seem to be active"
fi
echo ""
just plain thank you.
ReplyDeletesaved me lots of Trouble and some royal pain in the back while Setting up some stubborn 1&1 dedicated Server.
So, when you log into the busybox shell and run unlock, you're just trusting that the code on that partition has not been tampered with such that someone can't log your unlock phrase?
ReplyDelete